Inspired by Ellery Designs pallet wall pics and video, this summer I decided to do my own pallet wall with floating shelves for the dinning room.
After it was all said and done I got a new large 3ft clock and a new dinning room pub height set I'm really happy how it turned out.
“I have seen the dark universe yawning Where the black planets roll without aim, Where they roll in their horror unheeded, Without knowledge, or luster, or name.”
Friday, 20 October 2017
Saturday, 17 January 2015
Wednesday, 7 January 2015
Plastcraft Ewar buildings scale reference
Sure np here an bunch of picst on my game matt with someWIP roads and tree's I'm working on.
Infantry are PSC on Battlefront bases, The Artillery is BF tho. The IS2 ISU-122 and SU-122 are battlefront, the T-34 is PSC.
As I've said I think they're pretty close to HO scale..I think the infantry appear to be about 5ft tall
but I really don't mind..the buildings are just abit bigger and roomier then the Battlefield in a box one.
Infantry are PSC on Battlefront bases, The Artillery is BF tho. The IS2 ISU-122 and SU-122 are battlefront, the T-34 is PSC.
As I've said I think they're pretty close to HO scale..I think the infantry appear to be about 5ft tall
but I really don't mind..the buildings are just abit bigger and roomier then the Battlefield in a box one.
Friday, 2 January 2015
Plastcraft Sainte Mere-Eglise finished
Here it is fully assembled and pretty much done except for the grey edges that need to be washe'd and drybrush'd but I'm out of SW stone wash and have to wait till the LFGS comes their next batch into stock to finish
Overall pretty satisfied..I think in retrospect If i wasn't hurrying to finish before the christmas holidays were up I would have done a second highlight layer on the walls to brighten them up more..but otherwise it should work great on the table.
Thursday, 1 January 2015
Sainte Mere Eglise continued
Got the rest of the pieces drybrushed.. as well painted the details on the clocks and doors.overall its coming together.
after that I did a dryfit to see how it will look..and it seems like i need to paint the backs of the majority of pieces grey ..so thats up next
shouldn't affect the surfaces I've already painted tho.
after that I did a dryfit to see how it will look..and it seems like i need to paint the backs of the majority of pieces grey ..so thats up next
shouldn't affect the surfaces I've already painted tho.
Tuesday, 30 December 2014
Plastcraft Sainte Mere Eglise started.
I deciced to use the dupli-color grey sandable primer for the roof.. Its a very dark grey.
Then i gave the roof pieces a wash with SW Algae wash and drybrushed them with Reaper dusky skin.
The walls I sprayed all with army painters uniform grey and am trying a piece with SW stone wash and then I'm gonna drybrush reaper bathanlian Chitin for highlight and tone ad see how that works out.
I think i'm gonna skip painting the interior its a lot of surface to paint up for little gain..
wood floor I did in AP leather brown with SW sewer water wash.. will highlight with a light orange brown.
got the rest of the pieces washed..and tryed the drybrush color..i like it..maybe a second lighter coat with linen white to finish it off
good times!
Then i gave the roof pieces a wash with SW Algae wash and drybrushed them with Reaper dusky skin.
The walls I sprayed all with army painters uniform grey and am trying a piece with SW stone wash and then I'm gonna drybrush reaper bathanlian Chitin for highlight and tone ad see how that works out.
I think i'm gonna skip painting the interior its a lot of surface to paint up for little gain..
wood floor I did in AP leather brown with SW sewer water wash.. will highlight with a light orange brown.
got the rest of the pieces washed..and tryed the drybrush color..i like it..maybe a second lighter coat with linen white to finish it off
good times!
Saturday, 27 December 2014
PlastCraft EWAR03 building finished
used same basic tecniques as last few..color of room i primed grey then washed dark color of red or purple then drybrushed them with lighter color.
and heres a pic of the four buildings from the set all together. Next up the big church..but I do have 2 more sets of these buildings to do..should make an awesome city table.
and interiors
and heres a pic of the four buildings from the set all together. Next up the big church..but I do have 2 more sets of these buildings to do..should make an awesome city table.
and interiors
Sunday, 14 December 2014
Battlegroup Overlord Bloody Omaha Dog Green
We got some more work done on some beach assault terrain and decided to take a two day crack at a 4 player Historical Scenerio beach assault and used the built in Dog Green D-1 setup.
Two players were fairly new to the game system only playing a couple games but they really got an opportunity to see the game shine in this since they didn't have to worry about builing a force and knew the primary historical objectives.
In the end on the end of turn of 10 the German Moral broke and they fled the beach allowing the Americans to capture the beach.. The game was won by the artillery always having at least 1 six in each barrage...by turn two the 88MM bunker and the 75mm Infantry gun bunker were both destroyed by Naval Bombardments. By turn 4(when they were hitting the beach basically) the 20mm Flak was destroyed and The 50mm Gun on the beach only hit one DD tank before it was out of ammo and then destroyed leaving the MG Pits and limited Artillery and defenses to hold back the hordes of infantry.
It was a very fun game..and we could see if they artillery hadn't been so good and the 2+ saves were actually successful it could have went the other way easily.
heres some pics from the game.
Two players were fairly new to the game system only playing a couple games but they really got an opportunity to see the game shine in this since they didn't have to worry about builing a force and knew the primary historical objectives.
In the end on the end of turn of 10 the German Moral broke and they fled the beach allowing the Americans to capture the beach.. The game was won by the artillery always having at least 1 six in each barrage...by turn two the 88MM bunker and the 75mm Infantry gun bunker were both destroyed by Naval Bombardments. By turn 4(when they were hitting the beach basically) the 20mm Flak was destroyed and The 50mm Gun on the beach only hit one DD tank before it was out of ammo and then destroyed leaving the MG Pits and limited Artillery and defenses to hold back the hordes of infantry.
It was a very fun game..and we could see if they artillery hadn't been so good and the 2+ saves were actually successful it could have went the other way easily.
heres some pics from the game.
Thursday, 11 December 2014
EWAR02 Europeon Building complete
so got everything done(ok i forgot to highlight the doors..tomorrow LOL)
heres pic and then pic of 3 of the 4 from the set that are done..coming together nicely
Wednesday, 10 December 2014
EWAR02 almost done
got the main building assembled just gotta work on the detailing and touching up the exposed edges of the sheets on the chimney roof ect and
I really like the way the roof turned out on this one better..I'll try sticking with that technique.
Sunday, 7 December 2014
Plast Craft EWAR02 European Building Started
using the same base coat colors I've got the pieces primed with colored primer
I'm trying to do the inside sides of the walls as well for this one.
For the roof I just used the dark grey automative primer and used algae wash. its dark but I'll drybrush up a mid tone thats more blushish grey.
for the floors i just used army painter leather brown and sewer water wash.
I think i'll use the same blend of washes for the walls as i used for the small shop..maybe with colored trim instead of creame bone color.
edit: later that day
so i went and mixed 1:1 reaper bright turquoise and rainey grey together for the roof drybrush color..i think it turned out good
I'm gonna try the same basic style for the next two roofs..grey base and wash and drybrush color up..
floors i just used golden brown to drybrush and the walls graveyard bone
I'm trying to do the inside sides of the walls as well for this one.
For the roof I just used the dark grey automative primer and used algae wash. its dark but I'll drybrush up a mid tone thats more blushish grey.
for the floors i just used army painter leather brown and sewer water wash.
I think i'll use the same blend of washes for the walls as i used for the small shop..maybe with colored trim instead of creame bone color.
edit: later that day
so i went and mixed 1:1 reaper bright turquoise and rainey grey together for the roof drybrush color..i think it turned out good
I'm gonna try the same basic style for the next two roofs..grey base and wash and drybrush color up..
floors i just used golden brown to drybrush and the walls graveyard bone
Friday, 5 December 2014
Plast Craft EWAR04 Small shop finished
finished up the painting (cept maybe a logo on the sign not sure about that yet)
overall pretty happy with how it turned out.
Heres a pic beside the european house.
overall pretty happy with how it turned out.
Heres a pic beside the european house.
Monday, 1 December 2014
Plast Craft EWAR Small Shop
started working on building #2
I used the same primer for the walls ..Army painter Army green for the roof
Base coated the floors with 2:1 Reaper golden brown,Marigold Yellow.
For wash's I used a blend of armour wash and sewer water on the walls and didn't dilute this time.
the roof I used straight Algae wash
and the floors sewer water.
For the roof i dry brushed the mid town back using army green..then added a bit of linen white to it for last highlight .
the walls I just tried using Graveyard Bone..I'm trying for a different tone thats abit less custard and more creme.
Progress so far.
I used the same primer for the walls ..Army painter Army green for the roof
Base coated the floors with 2:1 Reaper golden brown,Marigold Yellow.
For wash's I used a blend of armour wash and sewer water on the walls and didn't dilute this time.
the roof I used straight Algae wash
and the floors sewer water.
For the roof i dry brushed the mid town back using army green..then added a bit of linen white to it for last highlight .
the walls I just tried using Graveyard Bone..I'm trying for a different tone thats abit less custard and more creme.
Progress so far.
Saturday, 29 November 2014
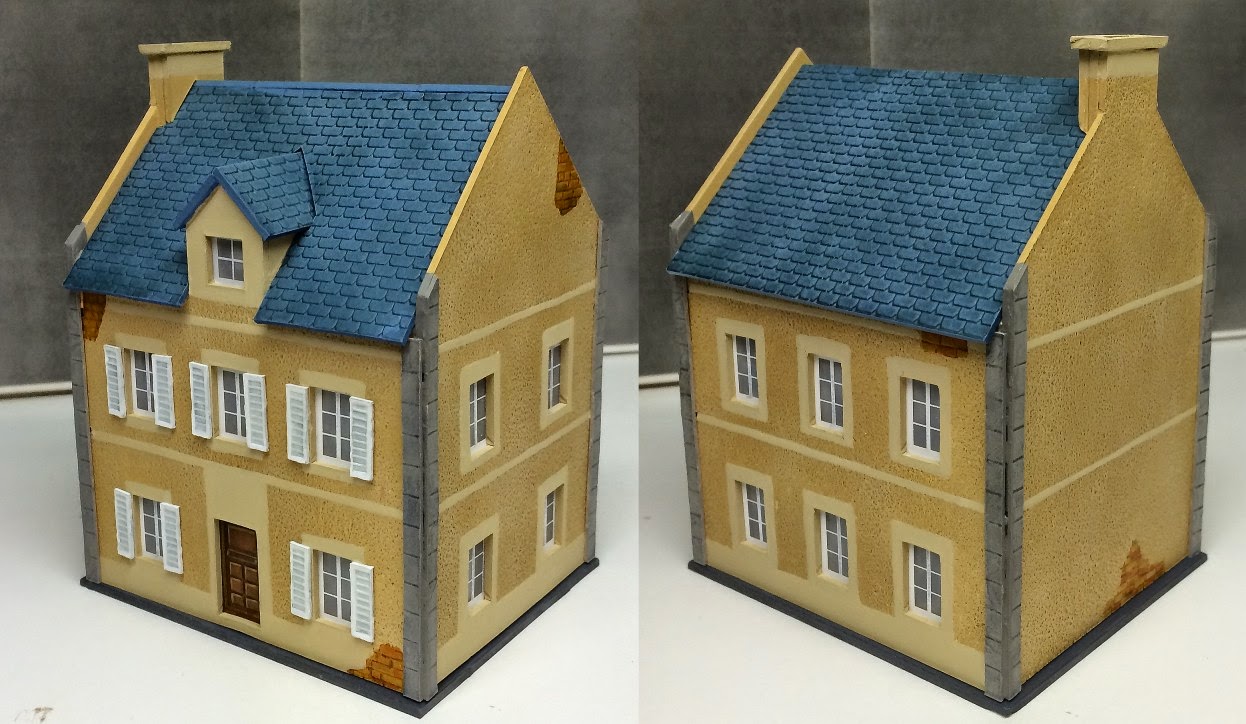
Plast Craft Normandy House EWAR series started
So slowly getting back into doing some painting and terrain building.
I think I'm gonna try and keep these buildings simple.. spraypaint colored primer, wash ,drybrush then minor detail work.
I'm gonna try not painting the inside of this first one and see if that works out for me.
for the base and wooden floors I used dark grey automotive sandable primer(cheap!) since i dont' have any brown primer atm
the roof tiles i used army painters wolf grey colored primer and for the walls Army painters Skeleton Bone colored primer.
I'm not really sure if these foamed pvc pieces need primer at all honestly..but better safe then sorry.
next day i painted the floors with Games workshops XV-88 brown and a 3to1 Reaper Golden Brown ,marigold yellow(which makes same color as xv-88)
then i used Secret Weapons Algae wash on the roof tiles. SW Sewer Water wash on the wood and a blend of SW Parchment and Sewerwater on the walls(about 5 to 1)
once they're dry I'll drydrush up the base color and highlight abit.
used a blend of Reaper Tanned leather and Linnen white to bring back the midtones of the walls.then drybrushed Reaper Yellowed Bone for the final highlight. Used pure Yellowed Bone to do the window frames and trim.
I used SW fleshwash over the bricks then picked out individual bricks with sewer water and red SW wash's for variation.
Overall I think it looks ok
For the roof I mixed 1:1 REaper denim blue and Ashen Blue to dry brush up the midtown then a 1:1 ashen blue and rainy grey for the final highlight color
used some golden brown with more marigold yellow added to highlight the wood floors and some grey for the floor base sides.
painted the door reaper oiled leather brown then when dry used sewer water to wash, when that dried used a blend of tanned shadow and marigold yellow to edge highlight.
painted the cinderblock corners grey and inside of the windows grey since I dont want these windows transparent
got the walls and floors all glued together its coming together pretty well. still need to do alot of the trim and finish installing the roof.
got the trim and shutters painted and attached. overall i'm pretty happy with the kit..for a budget gamer that doesn't wanna scratch build everything seems like the best option..
I think I'm gonna try and keep these buildings simple.. spraypaint colored primer, wash ,drybrush then minor detail work.
I'm gonna try not painting the inside of this first one and see if that works out for me.
for the base and wooden floors I used dark grey automotive sandable primer(cheap!) since i dont' have any brown primer atm
the roof tiles i used army painters wolf grey colored primer and for the walls Army painters Skeleton Bone colored primer.
I'm not really sure if these foamed pvc pieces need primer at all honestly..but better safe then sorry.
next day i painted the floors with Games workshops XV-88 brown and a 3to1 Reaper Golden Brown ,marigold yellow(which makes same color as xv-88)
then i used Secret Weapons Algae wash on the roof tiles. SW Sewer Water wash on the wood and a blend of SW Parchment and Sewerwater on the walls(about 5 to 1)
once they're dry I'll drydrush up the base color and highlight abit.
used a blend of Reaper Tanned leather and Linnen white to bring back the midtones of the walls.then drybrushed Reaper Yellowed Bone for the final highlight. Used pure Yellowed Bone to do the window frames and trim.
I used SW fleshwash over the bricks then picked out individual bricks with sewer water and red SW wash's for variation.
Overall I think it looks ok
For the roof I mixed 1:1 REaper denim blue and Ashen Blue to dry brush up the midtown then a 1:1 ashen blue and rainy grey for the final highlight color
used some golden brown with more marigold yellow added to highlight the wood floors and some grey for the floor base sides.
painted the door reaper oiled leather brown then when dry used sewer water to wash, when that dried used a blend of tanned shadow and marigold yellow to edge highlight.
painted the cinderblock corners grey and inside of the windows grey since I dont want these windows transparent
got the walls and floors all glued together its coming together pretty well. still need to do alot of the trim and finish installing the roof.
got the trim and shutters painted and attached. overall i'm pretty happy with the kit..for a budget gamer that doesn't wanna scratch build everything seems like the best option..
Saturday, 6 September 2014
Bolt Action .30cal USMC repositioning team finished
Got the team based and Matt Varnished and flocked..overall Im pleased with how they're turning out..tho I just haven't had the time to work on things as much as I'd like.
Heres pics of the finished team and a group shot which I'll update as more teams get finished.
Saturday, 30 August 2014
Bolt action .30cal Marines
after many delays I got the redeploying .30cal team painted and dipped about 20mins ago.. so it'll be 3 days before I can base them.
gonna work on the other 30cal team and try and stagger them. working on more then 3 at a time just kinda bums me out so not gonna try and
force things to much.
Here's a pic nice and shiny and wet..the shading will settle and after the matt varnish will be slightly less pronounced.
gonna work on the other 30cal team and try and stagger them. working on more then 3 at a time just kinda bums me out so not gonna try and
force things to much.
Here's a pic nice and shiny and wet..the shading will settle and after the matt varnish will be slightly less pronounced.
Sunday, 24 August 2014
Friday, 22 August 2014
More Bolt Action finished
Finished up the FOO team just basic basing..
Based the Mortar team on a large base used some plastic bamboo I ordered from China for making terrain but I think it works for basing..might be to tall tho..might need some tall grass aswell..any thoughts would be welcome
Monday, 18 August 2014
Bolt Action USMC FOO dipped
I got the next 5 figures painted..the other two from the FOO and the 3 men and Mortar from the 81mm Mortar team.
Due to how I've thinned the army painter dip over the years with Turpentine (I prefer it abit thin) it takes about 78hrs to really harden before applying the final Liquitex Matt Varnish.
Heres the first figure finished and flocked(think the plastic plants are to neon I'll need to buy some others) with the 2 other guys from the FOO just dipped acouple hours ago and then pic of the 3 marines from the 81mm team.
Due to how I've thinned the army painter dip over the years with Turpentine (I prefer it abit thin) it takes about 78hrs to really harden before applying the final Liquitex Matt Varnish.
Heres the first figure finished and flocked(think the plastic plants are to neon I'll need to buy some others) with the 2 other guys from the FOO just dipped acouple hours ago and then pic of the 3 marines from the 81mm team.
Friday, 8 August 2014
bolt action marines started
so I got the US Army FOO since they don't make a Marines FOO yet..I'm gonna start with these 3 to try and nail down the paint recipes.
Basecoat is as follows,
uniform: army painter army green
Skin: reaper tanned skin
belts and pouches: 2:1 Reaper Tanned Leather: Reaper Olive Green
Radio hardware : Reaper olive green
gun wood and helmet straps: oiled leather
boots and gun gun barrels etc: walnut brown
Highlights
skin: blend 1:1 tanned skin , tanned hightlights, final highlight pure tanned highlight
Uniform 2:1 army green,tanned highlight .mid highlight 1:1 ratio of the same Final highlight 1:2 green to tanned highlight
Belts and Pouches used same but added bit of linen white to it..then more linen for last highlight
Radio Hardware I just added some alien flesh grey to the olive green and line/edge highlighted.
gunwood and helmet straps: 2:1 oiled leather and added tanned leather then final 1:1
boots : slight layer of blackened brown and then some small edge highlights of alien grey .
gun and clasps: a thin layer of gun metal
Used Army Painter Strong Tone and used a brush to apply the dip and used a cheap fine brush to wick out the excess.
Its still wet but I've found it really takes 48hrs to really dry and harden before applying a matt cote to it and flocking.
So heres wet dip effect till monday , got the next one primed and ready to paint.
Basecoat is as follows,
uniform: army painter army green
Skin: reaper tanned skin
belts and pouches: 2:1 Reaper Tanned Leather: Reaper Olive Green
Radio hardware : Reaper olive green
gun wood and helmet straps: oiled leather
boots and gun gun barrels etc: walnut brown
Highlights
skin: blend 1:1 tanned skin , tanned hightlights, final highlight pure tanned highlight
Uniform 2:1 army green,tanned highlight .mid highlight 1:1 ratio of the same Final highlight 1:2 green to tanned highlight
Belts and Pouches used same but added bit of linen white to it..then more linen for last highlight
Radio Hardware I just added some alien flesh grey to the olive green and line/edge highlighted.
gunwood and helmet straps: 2:1 oiled leather and added tanned leather then final 1:1
boots : slight layer of blackened brown and then some small edge highlights of alien grey .
gun and clasps: a thin layer of gun metal
Used Army Painter Strong Tone and used a brush to apply the dip and used a cheap fine brush to wick out the excess.
Its still wet but I've found it really takes 48hrs to really dry and harden before applying a matt cote to it and flocking.
So heres wet dip effect till monday , got the next one primed and ready to paint.
Subscribe to:
Posts (Atom)